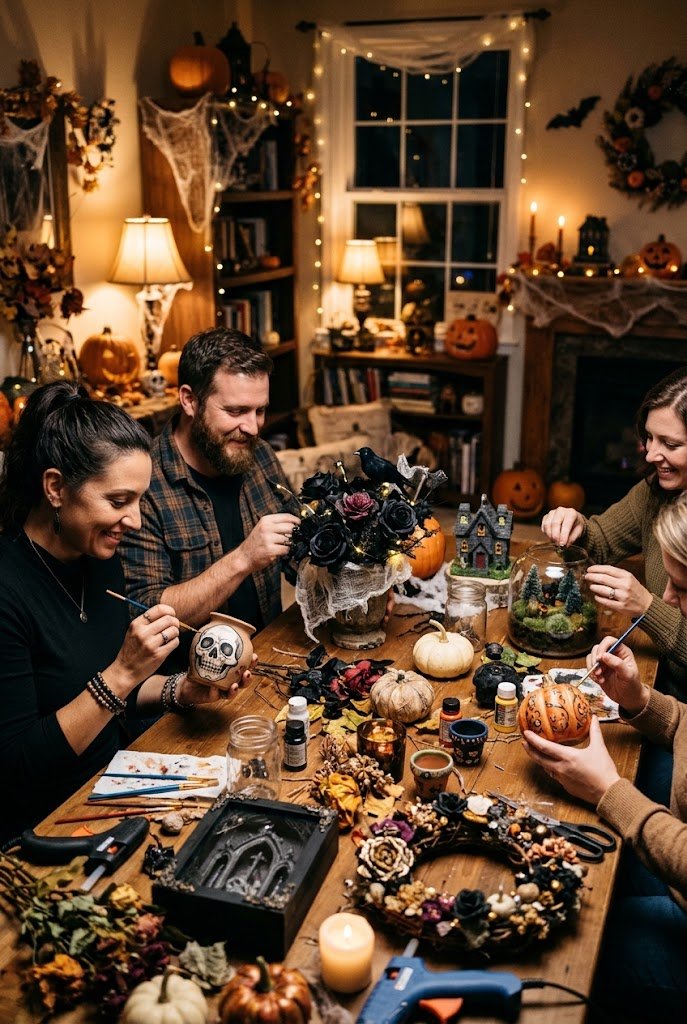
24 Halloween Crafts for Adults for a Spooktacular Night
Halloween decor doesn’t have to be expensive or complicated to make your home feel festive. A few creative details can turn ordinary corners into spooky, stylish spaces you’ll love showing off.
These halloween crafts for adults bring together elegant gothic accents, glowing lanterns, handmade wreaths, creepy candle holders, and charming pumpkin decorations. Whether you’re preparing for a Halloween party or simply want to add seasonal personality to your home, you’ll find ideas that suit different styles, budgets, and skill levels.
Sometimes, the best decorations come from materials you already have, such as glass jars, leftover ribbon, old books, and simple craft supplies. I’ve noticed that choosing a consistent color palette, such as black, burnt orange, and cream, can make homemade decor look more polished without spending much.
Inside, you’ll discover 24 inspiring projects with practical instructions and visual ideas to help you get started. Pick a favorite, gather your supplies, and create a Halloween atmosphere that feels uniquely yours.
Black Lace Candle Holders

The right candlelight can make an ordinary corner feel mysterious and inviting. Black lace candle holders bring that subtle gothic charm to a mantel, dining table, or Halloween centerpiece without requiring expensive decorations. Start with plain glass votive holders, small jars, or thrifted glass containers that fit your existing decor.
Cut black lace to wrap around each holder, then secure it with small dots of craft glue. Choose lace with an open pattern so the light shines through beautifully. For safety, use battery-operated LED candles instead of real flames near fabric. The result feels elegant rather than overly spooky.
Mini Pumpkin Table Centerpieces
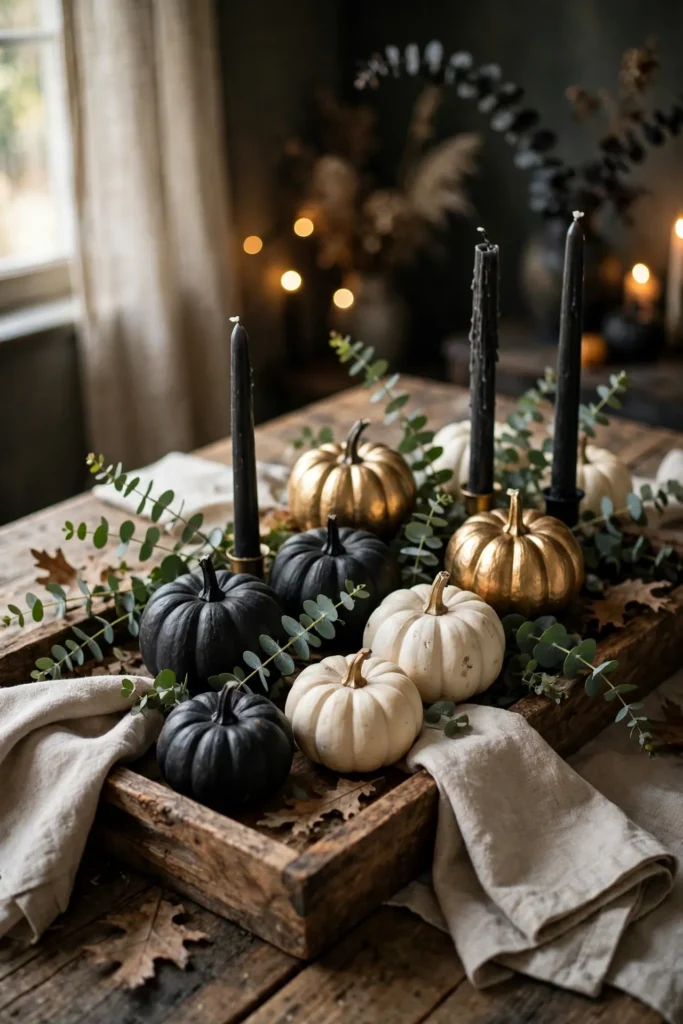
A few miniature pumpkins can make your Halloween table look thoughtfully decorated without covering every inch of it.
- Choose your palette: Combine matte black, warm white, and gold for a sophisticated look.
- Paint the pumpkins: Use acrylic craft paint on clean, dry pumpkins or faux pumpkins.
- Add metallic details: Brush gold paint onto stems or create thin stripes around the pumpkin ridges.
- Build the centerpiece: Arrange the pumpkins on a wooden tray with eucalyptus or dried foliage.
- Keep the table practical: Leave enough room for serving dishes, glasses, and place settings.
Faux pumpkins are especially useful because they can be stored and reused next year. For a budget-friendly display, mix two or three painted pumpkins with natural ones from a grocery store. Vary their sizes to create depth, and keep the tallest elements toward the center of the tray. Painted mini pumpkins work beautifully beyond Halloween, too, as these pumpkin baby shower theme ideas show.
Floating Witch Hat Lights
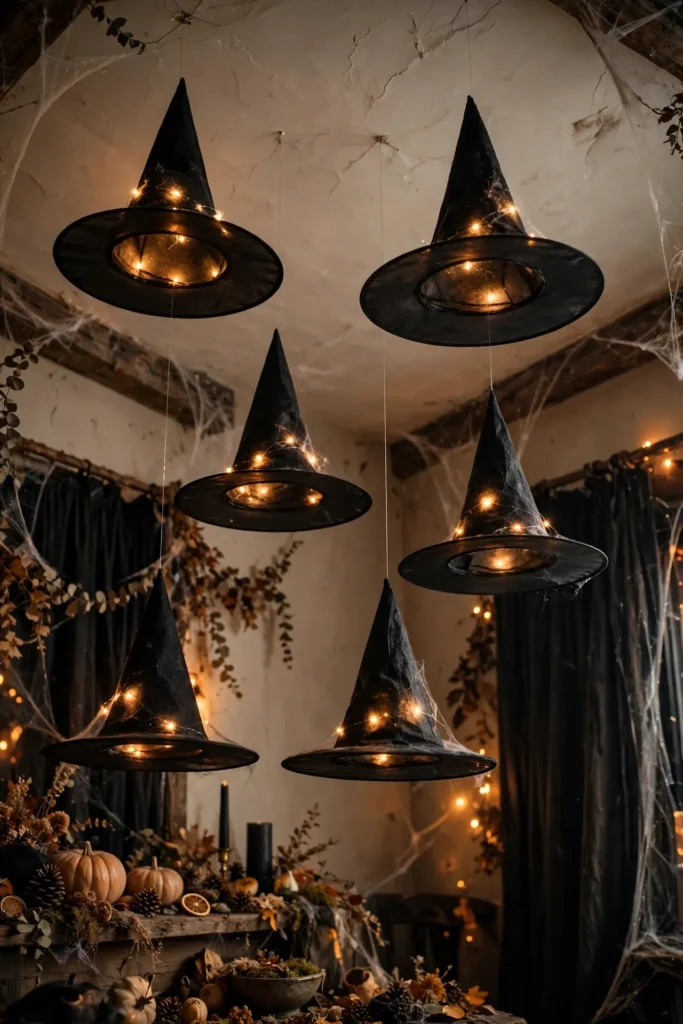
Turn an empty ceiling into a playful Halloween display with floating witch hats that appear to hover above your guests. This decoration works especially well over a dining table, entryway, or party corner where the suspended shapes catch everyone’s attention.
Quick Tip:
Choose lightweight witch hats and transparent fishing line for the cleanest floating effect. Attach the line securely to suitable ceiling hooks, checking the ceiling material and weight limits before hanging anything. Use battery-powered lights, and keep cords and decorations away from heat sources.
For each hat, place a small battery-operated fairy light inside and secure the line near the tip. Hang the hats at slightly different heights to create movement without making the room feel crowded. In my experience, an odd-numbered group often creates a more balanced decorative arrangement. Keep the lowest hat well above people’s heads, particularly near doorways and walkways.
Vintage Halloween Potion Bottles
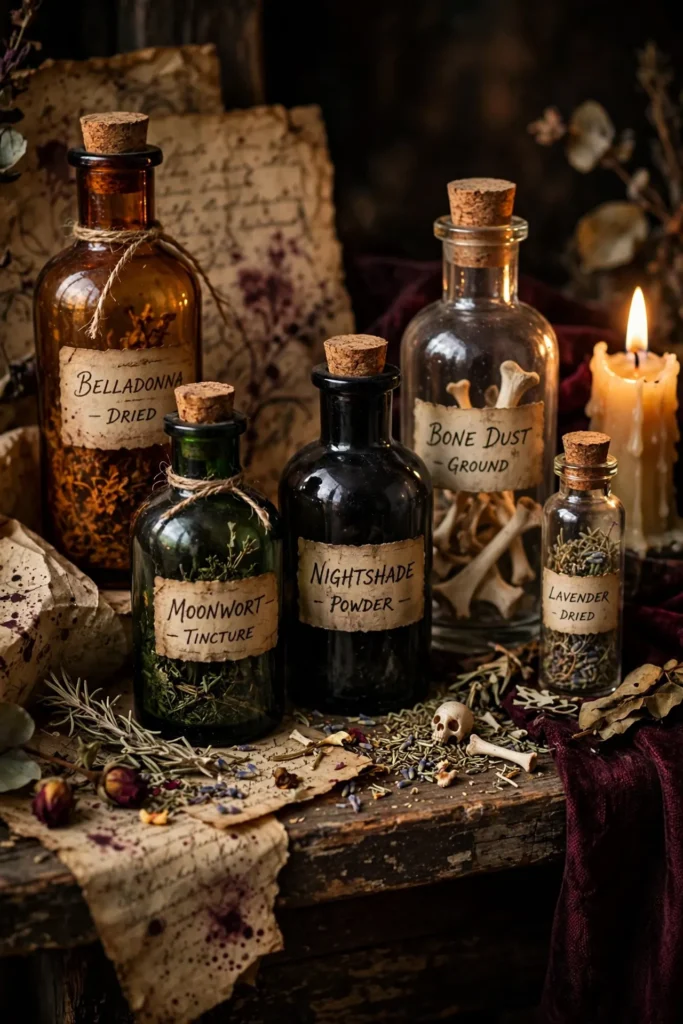
BEFORE
Plain glass bottles often look like leftover kitchen containers when displayed without decoration. Their different shapes can feel disconnected, especially on a Halloween shelf filled with other ornaments.
AFTER
With aged labels, dark ribbons, and carefully chosen colors, those same bottles become a coordinated collection of spooky potion props. Grouping them by height creates a vintage apothecary display. It’s a simple way to weave vintage home decor ideas into your Halloween styling.
Start with clean, dry bottles from your recycling bin or a thrift store. Print labels with names such as Moon Dust, Witch’s Brew, or Midnight Elixir, then lightly distress the paper edges with brown paint. Attach each label with craft glue and add cork stoppers or twine. Keep real household chemicals out of decorative bottles, and label any contents clearly if bottles are reused.
Spooky Painted Mason Jars

Give ordinary mason jars a spooky personality with a few coats of paint and simple hand-drawn faces. These little decorations work on bookshelves, windowsills, kitchen counters, or as a coordinated display beside your Halloween treats.
- Clean the jars: Wash them thoroughly, remove labels, and let them dry completely.
- Apply the base coat: Paint one jar white, another orange, and a third black using suitable glass or multi-surface acrylic paint.
- Add the faces: Use a fine brush or paint marker to create ghost eyes, a smiling pumpkin, or pointed cat ears.
- Let everything dry: Follow the paint manufacturer’s drying and curing instructions.
- Add the glow: Place battery-operated tea lights inside the jars for a soft evening effect.
For a polished arrangement, keep the faces simple and use similar-sized jars. You can also tie thin black ribbon around the rims or add small paper tags. Avoid exposing painted jars to food or drink unless the materials are specifically rated for that purpose. If younger helpers want to join the crafting, these Halloween crafts for children are a great place to start.
Gothic Black Flower Arrangements
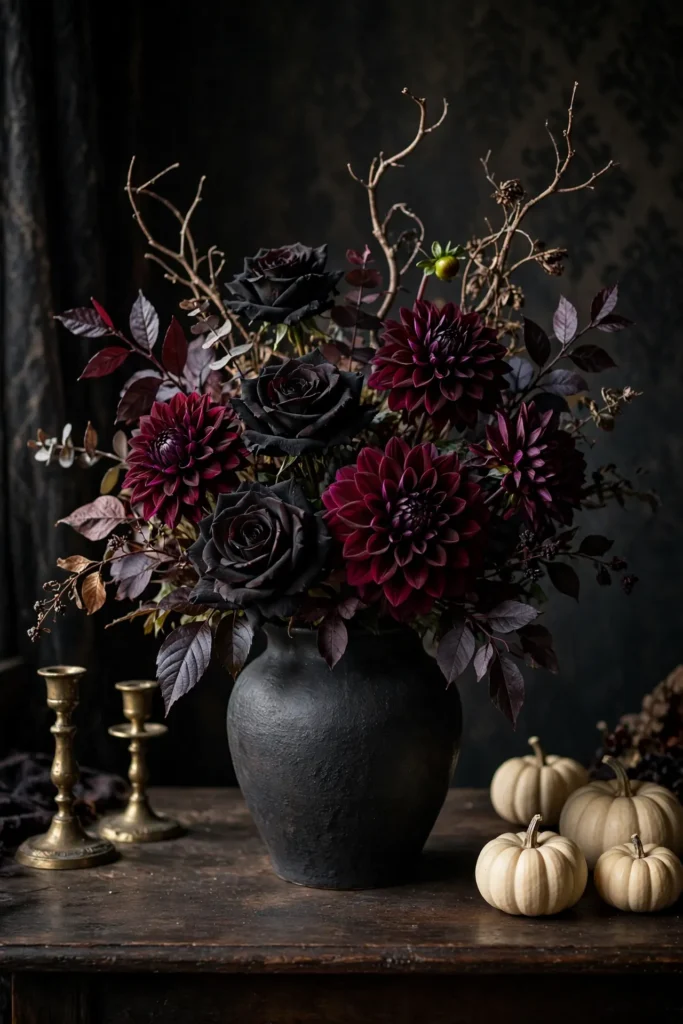
| Design choice | Option A: Classic Gothic | Option B: Modern Minimalist |
|---|---|---|
| Flowers | Black roses and burgundy dahlias | Mostly black roses with a few dark branches |
| Vase | Ornate vintage vessel | Simple matte black ceramic vase |
| Foliage | Dark eucalyptus and dried leaves | Sparse greenery or bare twigs |
| Finishing touches | Brass candlesticks and antique books | Ivory pumpkins and a plain dark tray |
Dark floral arrangements add a dramatic focal point without requiring plastic spiders or oversized Halloween props. Choose fresh flowers for a natural, soft appearance or artificial blooms for a reusable decoration. Arrange the tallest stems toward the back and shorter flowers around the edges to create a full silhouette.
For a budget-friendly version, spray-paint suitable artificial flowers black outdoors in a well-ventilated area, following the product label. Let them dry completely before arranging them. A few burgundy or deep purple blooms will add dimension, while an understated vase keeps the display sophisticated. Place it on an entryway console or dining table where the colors stand out.
Creepy Cheesecloth Ghosts

DO
- Drape white cheesecloth over a small balloon or foam ball supported by a bottle or jar.
- Apply fabric stiffener according to the product instructions to help the ghost hold its shape.
- Allow the fabric to dry completely before removing the support.
- Attach small black felt eyes with craft glue for a simple, expressive face.
DON’T
- Don’t use thin tissue paper that tears easily when wet.
- Don’t remove the support before the fabric is completely dry.
- Don’t make the ghosts too heavy if you plan to suspend them.
- Don’t hang them near open flames, hot bulbs, or other heat sources.
The secret to convincing cheesecloth ghosts is letting the fabric fall naturally rather than shaping every fold by hand. Place several ghosts at different heights above a mantel or arrange them along a shelf. Battery-operated lights nearby can highlight the gauzy texture without creating a fire hazard.
Rustic Halloween Wreath

Cost: Low to moderate, depending on the wreath base and embellishments.
Time: Approximately 45 to 90 minutes.
Skill Level: Beginner-friendly.
Best For: Front doors, entryways, and indoor wall displays.
A rustic wreath adds Halloween character before guests even step inside. Start with a grapevine or wire wreath base, then attach black ribbon, faux autumn leaves, and miniature pumpkins using floral wire or suitable craft adhesive. Arrange the decorations mostly on one side for a modern asymmetrical look, leaving some of the natural base visible. Carry that playful welcome into the yard with these funny outdoor Halloween decorations.
I’ve noticed that limiting a wreath to three main colors helps handmade decorations look more polished. Try black, burnt orange, and muted burgundy for a traditional gothic palette. If the wreath will hang outdoors, select weather-resistant materials and secure every lightweight embellishment against wind. A covered porch will help preserve delicate fabric and artificial foliage.
Bloody Handprint Glass Vases
Image Description: Clear cylindrical glass vases decorated with vivid red handprint designs, arranged on a dark console table beside black roses and small ivory pumpkins. Deep crimson paint contrasts with transparent glass and charcoal backgrounds. Dramatic side lighting, glossy reflections, moody shadows, and carefully styled gothic accents create a theatrical Halloween craft photograph from a slightly elevated angle.
Some Halloween decorations look most effective when they use one bold detail instead of lots of extra accessories. These dramatic glass vases bring a theatrical touch to a party table, mantel, or entryway display.
Choose clear glass vases with smooth surfaces and clean them thoroughly before decorating. Use removable red window paint or a suitable glass-safe craft medium to create handprint shapes. Test the material on a small area first, especially if you want to remove the design after Halloween. For a simpler alternative, apply red handprint decals to the outside of the glass.
Arrange the finished vases with black artificial roses or dark branches, keeping the surrounding decorations minimal. If you prefer a reusable design, removable decals are easier to store and replace than permanent paint. Keep painted surfaces away from food, and follow the product instructions for drying, handling, and cleanup.
Spiderweb Embroidery Hoops
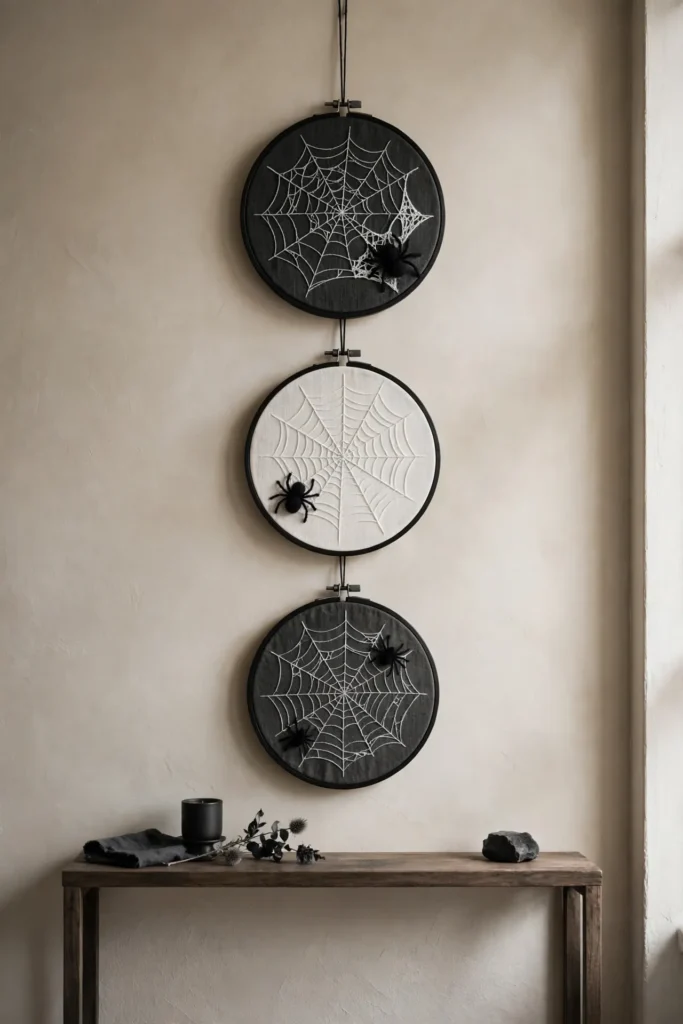
A few simple stitches can turn an ordinary embroidery hoop into understated Halloween wall art. These decorations suit apartments and smaller rooms where you want seasonal details without filling every surface with bulky ornaments.
- Choose the base: Select embroidery hoops in different sizes and black, cream, or charcoal fabric.
- Stretch the fabric: Tighten it evenly inside each hoop to create a smooth working surface.
- Mark the web: Use a fabric pencil to sketch a central point and several radiating lines.
- Stitch the design: Sew the main lines first, then connect them with curved stitches to form the web.
- Finish the display: Trim excess fabric and hang two or three hoops together.
White embroidery floss creates the strongest contrast against black fabric, while metallic silver thread gives the web a subtle shimmer. Beginners can use simple straight stitches instead of complicated embroidery techniques. Add a small felt spider if you want a playful detail, or leave the design minimal for a more sophisticated look.
Glowing Pumpkin Lanterns
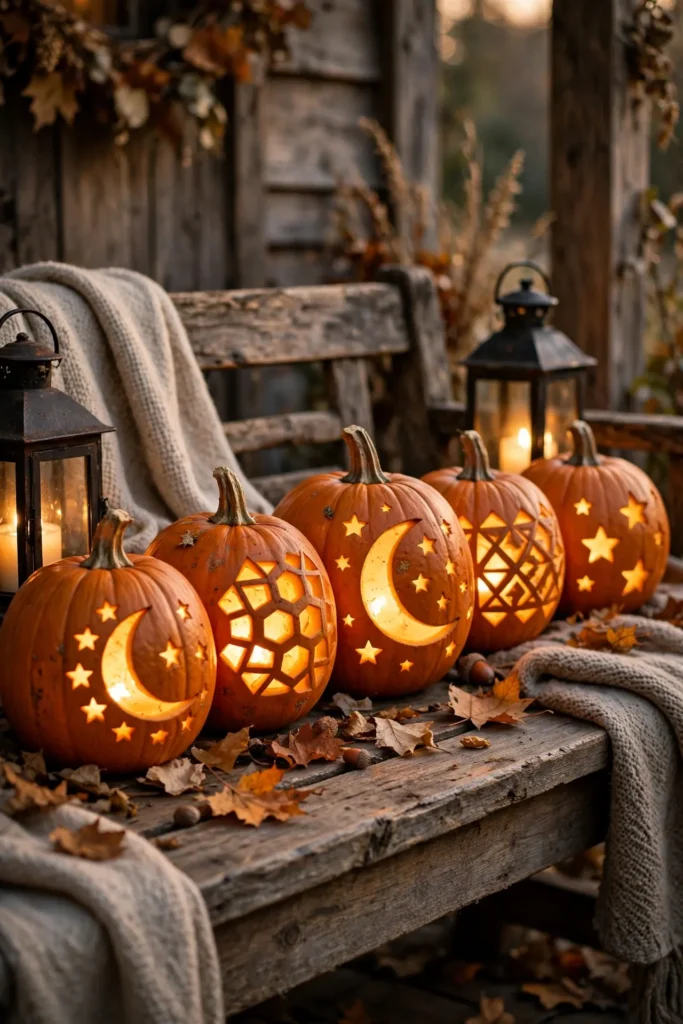
Quick Tip:
Choose pumpkins with flat bottoms so they sit securely while you work. Sketch your design with a washable marker before cutting, and use a stable work surface with a pumpkin carving tool suited to the task. For an easier no-carve version, paint the pattern onto the pumpkin and let it dry.
To make the lanterns, cut a small opening and remove the seeds and stringy pulp if you are carving a real pumpkin. Carefully cut simple shapes into the shell, then place a battery-operated LED light inside. Faux pumpkins are useful for detailed designs you want to reuse each year. Keep the finished lanterns away from fabrics and other flammable decorations, and avoid real candles inside carved pumpkins.
Haunted Mirror Frames

BEFORE
A plain mirror can feel disconnected from the rest of your Halloween decor, especially when nearby shelves and tables already feature dark colors and seasonal ornaments. Adding too many unrelated decorations may also make the area look cluttered.
AFTER
A few carefully placed details turn the mirror into a spooky focal point that ties the room together. A dark frame, wispy artificial cobwebs, and tiny spiders create an aged haunted-house effect without hiding the reflective surface.
Start by cleaning the mirror and frame, then attach lightweight decorations with removable adhesive suitable for the finish. Drape a small amount of artificial webbing around the outer corners instead of covering the glass. Add a burgundy ribbon at the top for a subtle color accent. Keep decorations away from hanging hardware and avoid adhesives that could damage antique finishes or delicate frames.
Halloween Shadow Lanterns
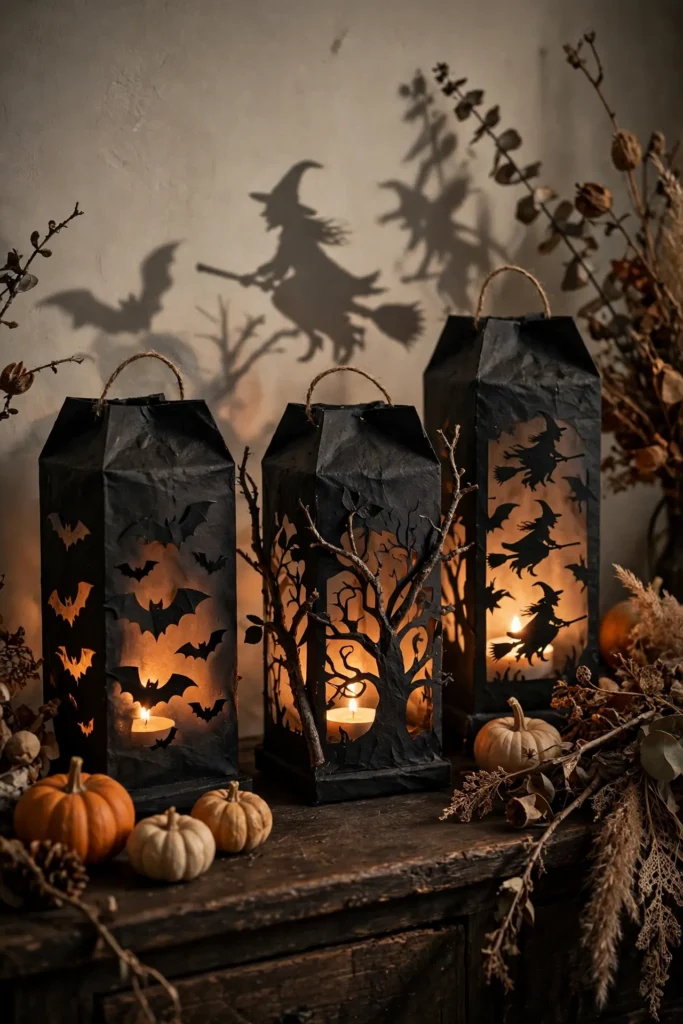
- Prepare the paper: Cut black cardstock into rectangular panels sized to form small lanterns.
- Draw silhouettes: Sketch bats, crescent moons, crooked trees, or haunted houses on each panel.
- Cut carefully: Use a craft knife and cutting mat to remove the shapes, keeping your fingers clear of the blade.
- Build the lanterns: Fold the panels and secure the edges with double-sided tape or suitable craft adhesive.
- Add the glow: Place a battery-operated LED tea light inside each lantern.
These shadow lanterns create a striking display without needing expensive lighting equipment. For the best effect, place them in a slightly dim corner where the cutout patterns can cast visible shadows. Keep the cardstock away from real flames and hot bulbs. If you want a coordinated look, repeat the same silhouette across several lanterns while varying their heights.
Halloween Candy Display Trays

| Feature | Option A: Classic Halloween | Option B: Elegant Gothic |
|---|---|---|
| Tray | Orange or black plastic tray | Matte black wooden tray |
| Containers | Colorful paper cups | Small glass bowls |
| Decorations | Plastic spiders and candy corn | Miniature black pumpkins and dark ribbon |
| Candy colors | Orange, purple, green | Black, gold, burgundy, and cream |
| Best setting | Family parties and casual gatherings | Dinner parties and adult celebrations |
A well-organized candy tray makes party treats look inviting while keeping serving simple. Choose a tray with raised edges, then group candies by type or color so guests can quickly see their options. Use small bowls for loose sweets and individual wrappers for treats that need extra protection.
For a polished display, leave a little space between each group instead of filling every gap with decorations. Add miniature pumpkins around the edges, keeping ornaments separate from unwrapped food. If guests have allergies, retain original ingredient packaging and clearly identify common allergens. The result is both festive and practical for a Halloween gathering.
Black Feather Table Decor
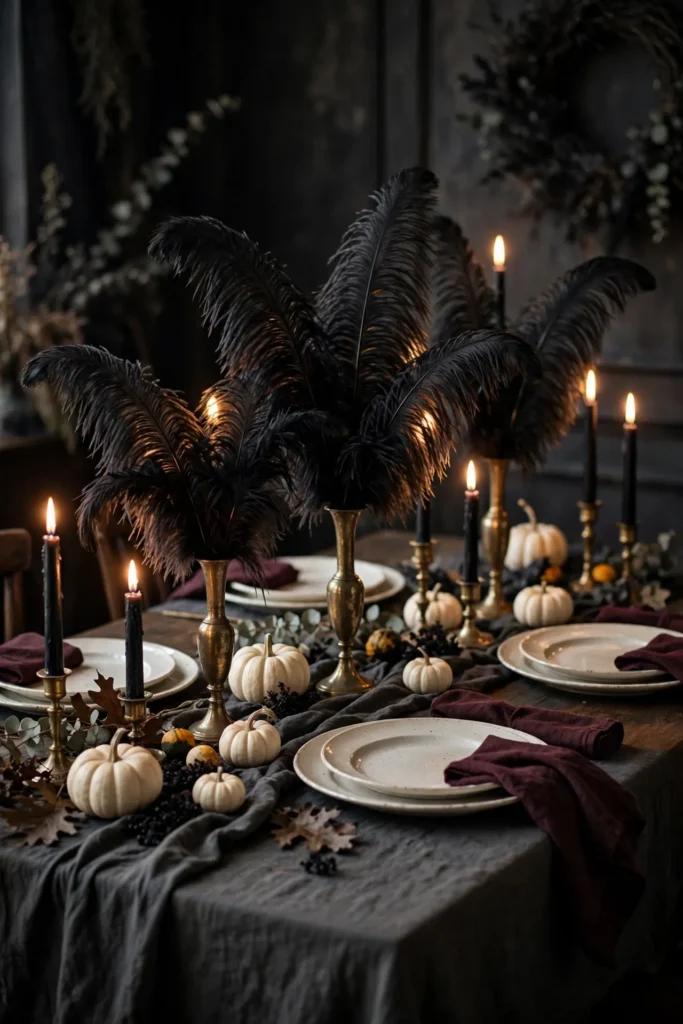
DO
- Arrange black feathers in tall vases to create height without using bulky decorations.
- Pair them with ivory pumpkins or cream tableware for contrast.
- Use charcoal or burgundy napkins to connect the arrangement with the rest of the table.
- Keep feather arrangements at the sides of the table so guests can see each other.
DON’T
- Don’t use loose feathers near open flames or hot candleholders.
- Don’t choose oversized arrangements that block conversation across the table.
- Don’t mix too many competing colors or metallic finishes.
- Don’t use fragile vases where guests could easily knock them over.
Black feathers add texture and drama to a Halloween dinner without relying on cartoonish decorations. Place them in stable vases and combine them with simple table linens for a sophisticated finish. Battery-operated taper candles provide atmospheric lighting with less risk around lightweight feathers, especially when the table will be busy with food and guests. For the rest of the season, these fall table centerpiece ideas keep the table feeling festive.
Witch Broom Wall Decor
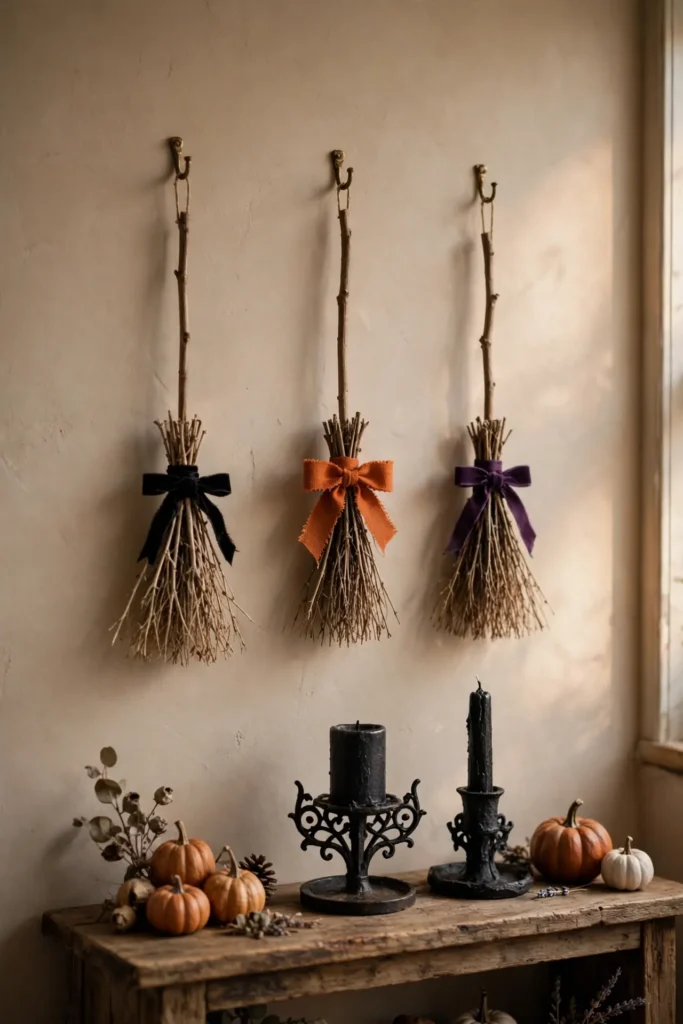
Cost: Low, especially when using fallen twigs and leftover ribbon.
Time: 20 to 40 minutes.
Skill Level: Beginner.
Best For: Entryways, gallery walls, and Halloween party corners.
Small witch brooms bring a rustic, handmade touch to seasonal wall decor. Gather straight, dry twigs for the handles and thin branches for the bristles. Bundle the bristles around one end of each handle, then secure them tightly with floral wire or strong craft twine.
Wrap a ribbon around the binding to hide the wire and introduce a little color. Hang the finished brooms individually or arrange three together at different heights. For a cleaner look, keep the handles similar in length and vary the ribbon colors instead. If collecting natural materials outdoors, choose fallen twigs and check them for insects before bringing them inside.
Spooky Book Stack Decor

Old books can become convincing Halloween props with little more than paper covers, paint, and a few carefully chosen details.
- Select your books: Choose unwanted hardcover books or lightweight cardboard boxes in different sizes.
- Create the covers: Wrap them in black, charcoal, or burgundy paper, smoothing the edges neatly.
- Add spooky titles: Use cream lettering, metallic markers, or printed labels for names such as Midnight Secrets and The Witch’s Handbook.
- Age the finish: Lightly brush brown paint along the edges of the paper covers for a worn appearance.
- Arrange the stack: Place the largest book at the bottom and add a small skull or faux raven on top.
A consistent color palette helps the stack look like a collection rather than unrelated props. If you want a vintage finish, mix matte surfaces with a small amount of metallic gold lettering. Keep valuable books out of the project, and use removable covers when decorating books you plan to return to your shelves after Halloween.
Skeleton Hand Jewelry Holders

| Feature | Option A: Ready-Made Hand | Option B: DIY Hand |
|---|---|---|
| Main material | Plastic skeleton hand | Air-dry clay or a hand-shaped craft form |
| Preparation | Clean and position the hand | Shape, dry, and paint the hand |
| Finish | Leave ivory or apply matte black paint | Add ivory, gray, or aged bone effects |
| Base | Small wooden display stand | Painted wood or a sturdy craft base |
| Best advantage | Faster and easier | More freedom to customize |
A skeleton hand turns everyday jewelry storage into a distinctive Halloween accent. Choose a stable hand with fingers positioned far enough apart to hold rings without tangling them. A small base keeps the display upright and makes it easier to move between a vanity, dresser, or party table.
For a DIY version, shape the fingers carefully and allow the material to dry fully before adding paint. Keep the finish matte for a realistic bone effect, or use metallic details for a more theatrical style. Check that the base cannot tip over when several rings are added. This practical decoration can remain useful long after the Halloween season ends.
Halloween Silhouette Window Art

DO
- Choose black cardstock for bold silhouettes that show clearly against illuminated windows.
- Sketch simple shapes such as bats, cats, crooked branches, or haunted rooftops.
- Cut the designs carefully with sharp scissors or a craft knife on a cutting mat.
- Attach lightweight shapes with removable window-safe adhesive or suitable low-tack tape.
DON’T
- Don’t cover every part of the glass, especially windows used for visibility.
- Don’t apply permanent adhesive to delicate glass or painted frames.
- Don’t place decorations where they obstruct views near stairs or entrances.
- Don’t use candles directly beside paper silhouettes or hanging curtains.
Window silhouettes create a dramatic Halloween scene without taking up valuable floor space. Arrange larger shapes near the bottom and smaller bats near the top to create visual balance. For an especially striking effect, switch on a nearby lamp after sunset so the cutouts stand out against the glass. Test your adhesive on a small area first to avoid residue.
Gothic Lace Table Runners
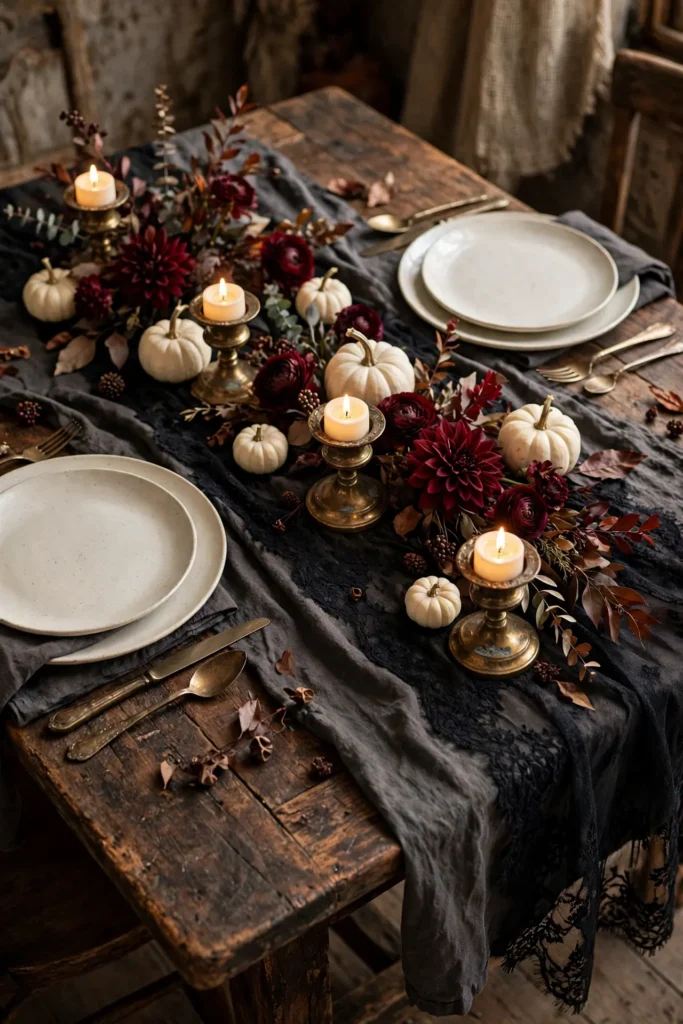
Cost: Low to moderate, depending on the lace fabric.
Time: 20 to 45 minutes.
Skill Level: Beginner-friendly.
Best For: Dining tables, console tables, and Halloween buffets.
A lace table runner adds instant gothic detail while allowing the natural texture of your table to show through. Choose black lace for a dramatic effect or deep burgundy for a softer autumn palette. Measure your table first, allowing enough length for a small overhang at each end without creating a tripping hazard.
If you are using lace fabric rather than a ready-made runner, trim the edges neatly and finish them with fabric glue or a simple hem to prevent fraying. Layer the runner over a plain linen cloth when you want the pattern to stand out more clearly. Keep the center arrangement low enough for comfortable conversation, and use battery-operated candles near delicate fabric.
Creepy Halloween Specimen Jars
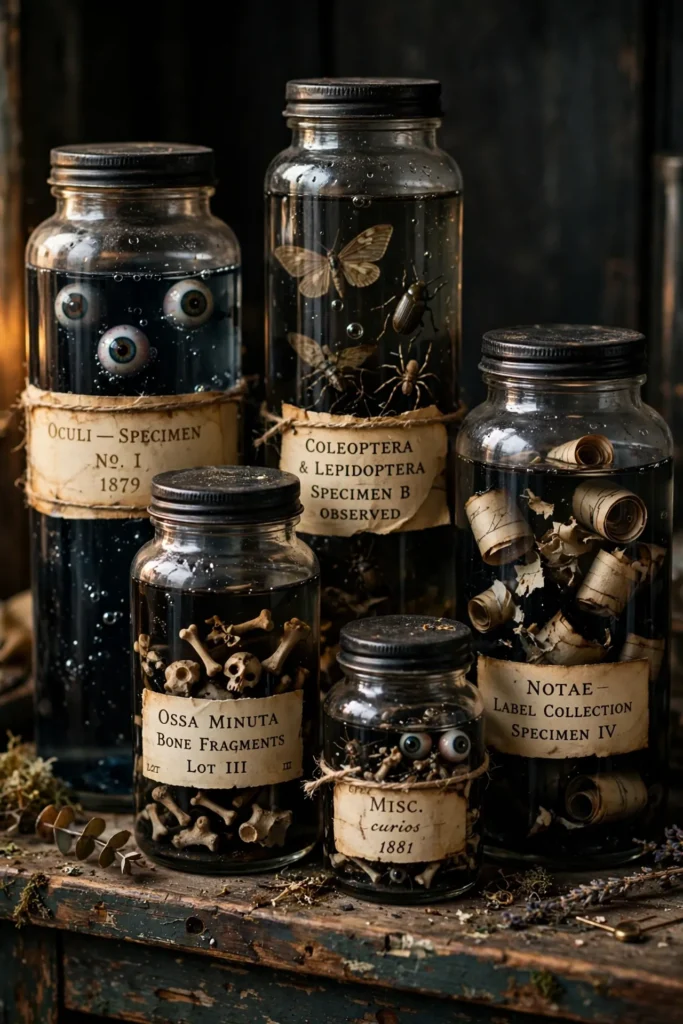
A few clear jars can create the atmosphere of a mysterious Halloween laboratory without expensive props. Choose containers in different shapes, then fill them with lightweight decorative items such as plastic spiders, rubber eyeballs, faux bones, or artificial leaves.
Quick Tip:
Use clean, dry jars and nonperishable decorations whenever possible. If you want the appearance of colored liquid, use sealed decorative inserts or tinted water in a securely closed container, and keep it separate from edible food or drink. Never mix household chemicals to create a spooky effect.
Finish each jar with a black lid and an aged paper label such as Spider Specimens or Unknown Botanical Sample. Arrange the containers in small groups, mixing tall jars with shorter ones to create height. For a convincing display, keep the label lettering consistent and avoid overcrowding the shelf. Secure the jars on a stable surface, particularly if children or pets may be nearby.
Black Cat Pumpkin Decor
BEFORE
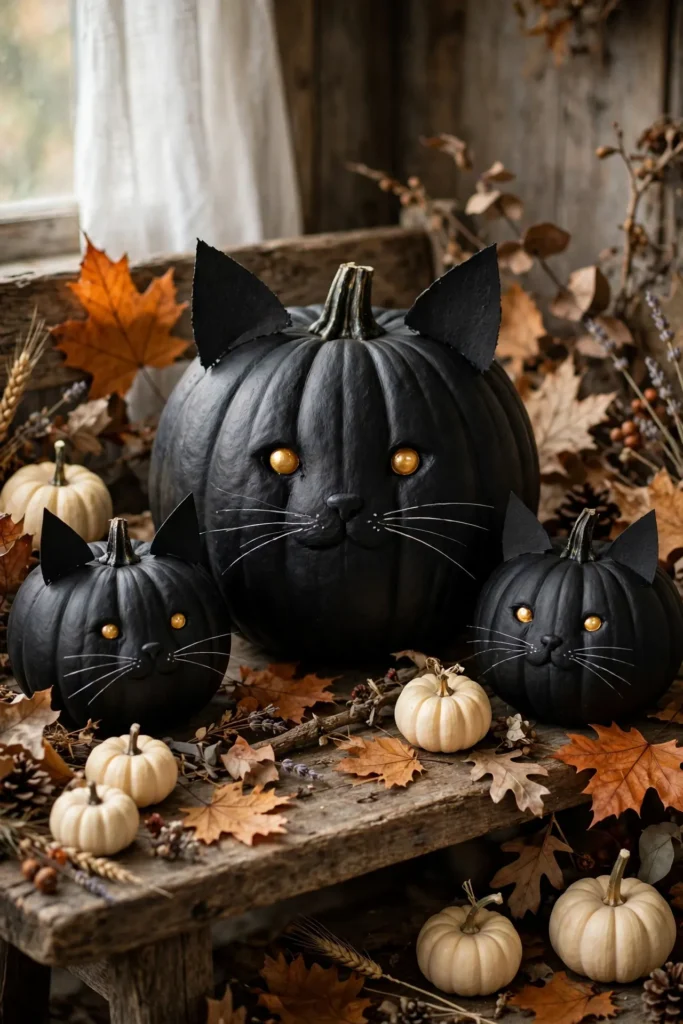
Plain pumpkins can blend into a crowded Halloween display, especially when surrounded by traditional orange decorations. A shelf may need a stronger focal point to feel coordinated and distinctive.
AFTER
Matte black pumpkins with pointed ears and expressive cat faces create a playful display with a modern gothic feel. Mixing different sizes adds depth while keeping the overall arrangement simple.
Paint clean, dry pumpkins with black acrylic craft paint, allowing each coat to dry according to the manufacturer’s instructions. Cut triangular ears from sturdy black cardstock and attach them securely near the stem. Add golden paper eyes and thin white whiskers using craft materials suitable for the pumpkin’s surface. Faux pumpkins work particularly well because they can be stored and reused. Keep the finished cats on a stable shelf away from walkways.
Halloween Potion Serving Station
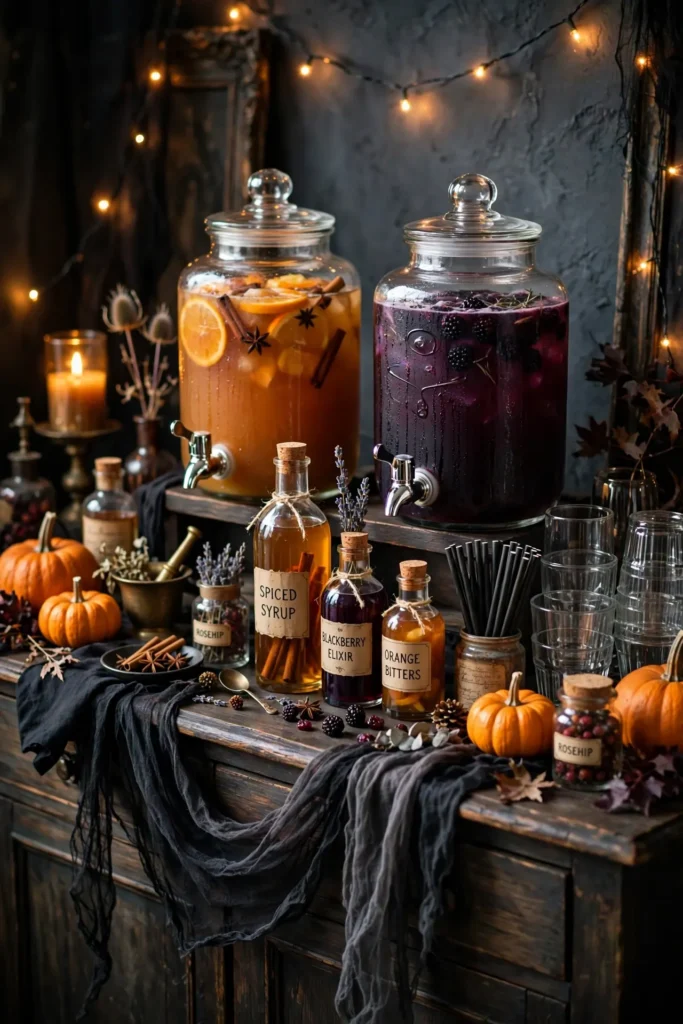
A dedicated potion station keeps guests refreshed while giving your Halloween party a memorable focal point. Start with a sturdy sideboard or table and arrange drinks, glasses, and serving supplies so everything is easy to reach.
- Choose two signature drinks: Offer one colorful nonalcoholic punch and one simple infused water.
- Label each beverage: Use small cards with playful names such as Midnight Punch or Witch’s Potion.
- Arrange the glassware: Group cups beside each dispenser, with napkins and stirrers nearby.
- Add seasonal accents: Place miniature pumpkins and artificial cobwebs around the edges, away from food.
- Keep it practical: Provide a small tray for spills and enough space for guests to serve themselves.
For a coordinated display, use clear dispensers that show off the drink colors and repeat black, orange, and deep purple in the labels. Keep perishable beverages chilled as needed, and avoid placing decorative materials where they can touch drinks or serving utensils. A tidy station makes hosting easier and keeps the party area looking polished.
Haunted House Shadow Boxes
Quick Tip:
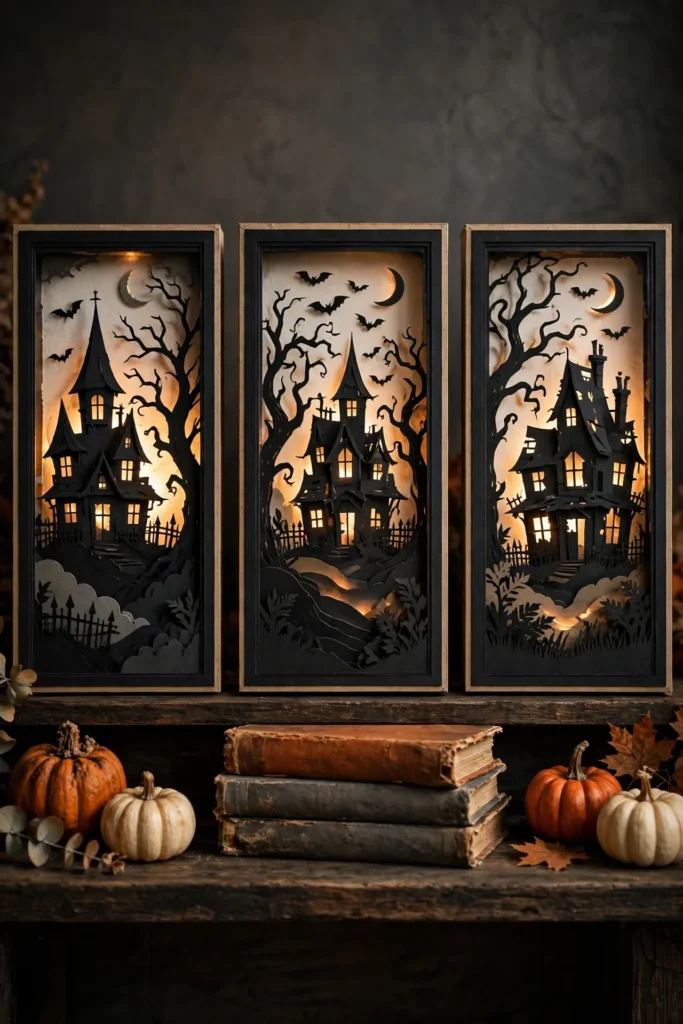
Use a deep frame or sturdy cardboard box so you can layer several cutout shapes without crushing them. Keep the front silhouette darker than the background, and place a battery-powered LED light behind the layers for depth. Test the lighting before permanently attaching the pieces.
Cut a background from dark blue, charcoal, or muted orange cardstock, then add progressively smaller layers featuring houses, trees, and bats. Use foam adhesive squares between layers to create visible depth and shadows. Secure the finished composition inside a shadow box frame, keeping the light source accessible for battery replacement.
For a cohesive Halloween display, repeat a few shapes across multiple frames while changing the background colors. Place the boxes on a mantel, bookshelf, or entryway console where the layered silhouettes can be seen clearly. Lightweight paper designs are easy to store flat or protect inside their frames, making this a reusable seasonal craft.
Conclusion
Creating a spooky home doesn’t require expensive decorations or professional crafting skills. These 24 halloween crafts for adults offer plenty of inspiration, from sophisticated black lace accents to playful pumpkin designs and glowing handmade lanterns.
Start with one project that matches your style, then add more as time and budget allow. Small details can make a room feel festive, welcoming, and ready for Halloween night.
Save this article on Pinterest so your favorite ideas are easy to find later. Try a project, share the inspiration with friends, and enjoy creating a Halloween space that reflects your creativity.
Pair your handmade decor with a set of funny halloween costumes for families.

One Comment