24 How to Organize Small Pantry Deep Shelves Like a Pro
Deep pantry shelves can hide the foods you need, leaving you to move boxes just to find one ingredient. A few smart changes can bring everything within easy reach.
These ideas for how to organize small pantry deep shelves show ways to use the space from front to back. Explore clear bins, shelf zones, labels, date rotation, and storage for cans, packets, and bulk supplies. Before buying organizers, measure your shelves and note what your household uses most. The right setup can make groceries easier to put away, reduce forgotten items, and help you see what needs restocking. Whether you have a narrow cupboard or a compact walk-in pantry, you can choose practical changes that fit your space and routine.
Clear Front Bins
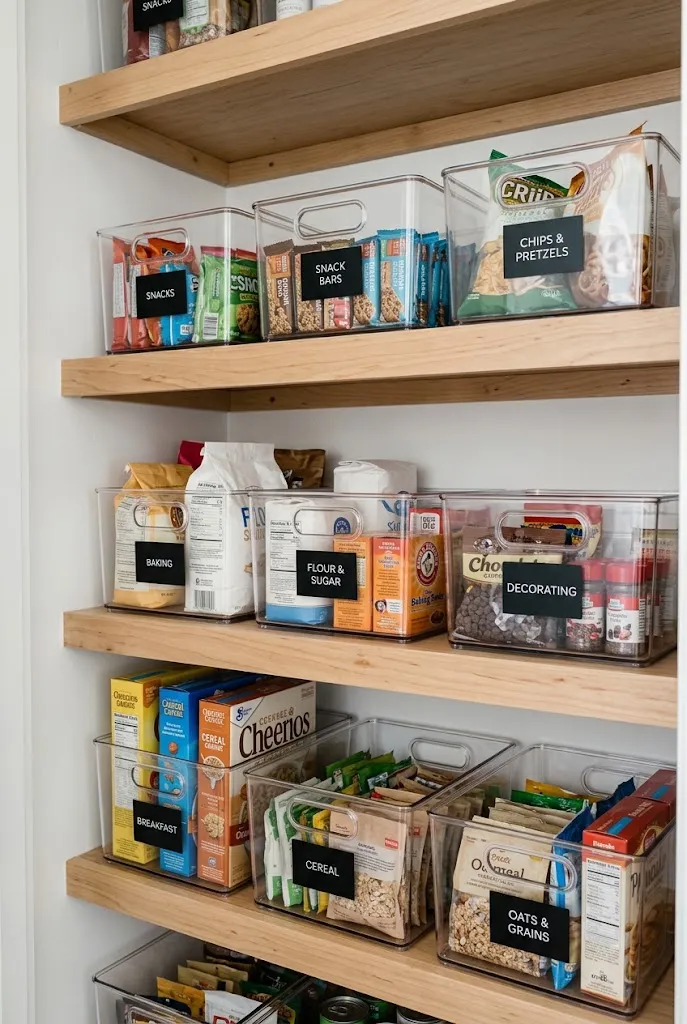
Clear bins make deep shelves easier to scan from the doorway. Group packets, snacks, or baking supplies by category, then place each group in a handle-front container you can pull forward. Labels on the front save time when the bins are pushed back after restocking.
For anyone wondering how to organize small pantry deep shelves, start with categories your household actually uses. Measure shelf depth and choose bins that leave a little room at the back and sides. Avoid overfilling them; a lighter bin slides out more easily and lets you see what needs replenishing.
Turntable for Bottles
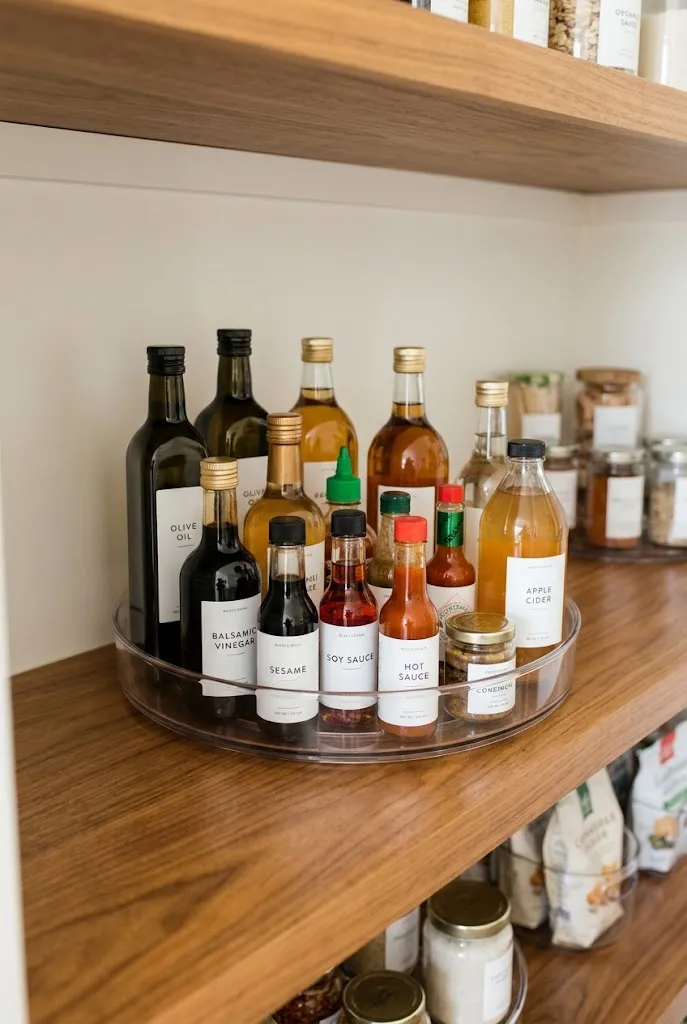
- Keep oils and sauces together on a turntable near the front.
- Choose a tray with a raised edge to help bottles stay in place.
- Leave enough clearance to rotate it without hitting the wall.
- Wipe the tray regularly if bottles leave drips or sticky residue.
A turntable brings bottles from the back of a deep shelf within easy reach. Sort them by use, such as cooking oils or condiments, so you can grab the right one with a quick spin. Put heavier glass bottles near the center, where they are less likely to tip.
Tiered Can Risers

Quick Tip: Choose a riser that fits the shelf width and depth. Place shorter cans in front and taller cans behind so labels stay visible.
Tiered risers turn a flat shelf into a stepped display, making it easier to spot cans before buying more. Group similar foods together, and avoid stacking extra cans on top of the riser. Leave enough space above it to lift items out without scraping the next shelf.
Slide-Out Shelf Baskets
BEFORE: Small packets disappear behind taller containers, and reaching for items at the back means moving everything in front. Open shelves look crowded even when some supplies are nearly empty.
AFTER: Slide-out baskets bring the full contents forward in one motion. Separate baskets for snacks, baking, and meal staples make it easier to find what you need and notice what is running low.
Measure shelf width and height before choosing baskets, and check that their rails or handles will not catch on nearby items. Keep heavier packages on lower shelves, where a full basket is easier to lift safely. A simple label on each front helps everyone return supplies to the right place.
Backstock Date Labels
- Group duplicates: Keep unopened extras together by food type, such as pasta or cereal.
- Mark the purchase or best-by date: Use a small removable label on the front of each bin.
- Place older items first: Bring earlier purchases forward and slide newer stock behind them.
- Check before shopping: Review the backstock bin before adding duplicates to your list.
When deciding how to organize small pantry deep shelves, a simple date system can prevent forgotten extras from expiring at the back. Use the package’s printed date as your guide, and avoid removing important food information. A quick check before grocery shopping can save money and reduce waste.
Front and Back Zones

A clear front-to-back plan keeps daily items close without wasting the back of a deep shelf.
| Zone | Everyday Items | Reserve Items |
| Placement | Front edge | Back section |
| Examples | Open cereal, snacks | Unopened refills, bulk packs |
| Access | Grab throughout the week | Pull forward during restocking |
Leave a narrow hand-width gap between zones so you can reach the reserves without unloading the shelf. Use a shallow bin for backstock, especially for small packets that might otherwise slide out of view. Move an item forward when its current container is nearly empty.
Pantry Door Rack
DO
- Check the door’s weight limit before loading the rack.
- Store lightweight packets and small jars in the shallow shelves.
- Leave clearance so the rack does not hit pantry shelves.
DON’T
- Hang heavy glass bottles above eye level.
- Block the latch or prevent the door from closing.
- Overfill the rack until items are hard to see.
A door rack can hold small items that otherwise get lost between larger packages. Before installing it, measure the gap between the closed door and the pantry shelves. Keep heavier items on the lowest rack, and review the contents regularly so expired packets do not linger.
Clear Dry-Goods Canisters
Best For: Frequently used dry goods
Cost: Low to moderate, depending on container size
Skill Level: Beginner
Result: Contents are visible and easy to portion
Matching canisters make it easier to check how much flour, cereal, or rice remains. Choose airtight containers sized for the amount you buy, and keep them on a shelf with enough height to lift the lids. Save the original package information, including ingredients and best-by dates, for reference.
Vertical Shelf Dividers
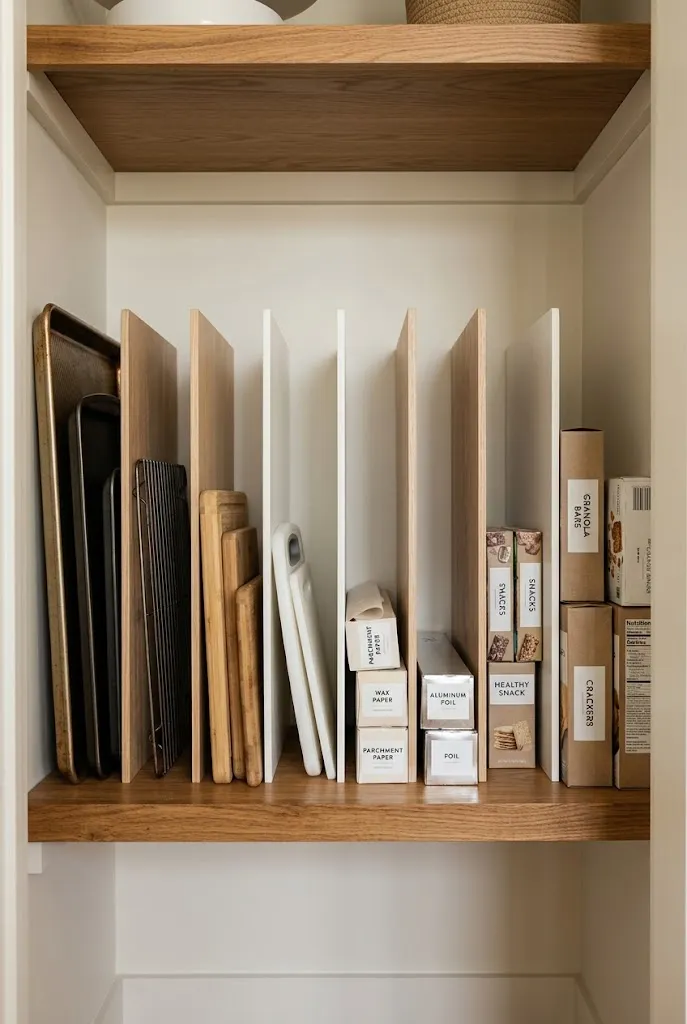
Upright storage can free shelf space that flat stacks often waste. Group trays, cutting boards, and slim boxes by size, then use dividers to keep each group standing. Measure the height between shelves first, especially if you store tall baking sheets or boxed wraps.
In a deep pantry, vertical slots also stop lighter items from getting buried beneath heavier ones. Keep the most-used tray near the front and reserve the back for occasional baking pieces. Choose dividers with a stable base, and avoid packing them so tightly that items scrapWashable Shelf Liners
- Measure each shelf before cutting a liner to size.
- Choose a washable, food-safe liner that lies flat.
- Smooth out bubbles so containers sit evenly.
- Lift and clean the liner if spills reach underneath.
A shelf liner can make small spills easier to clean, especially beneath oils, syrups, or flour. Remove items before wiping the surface, and let the shelf dry fully before replacing food. A neutral liner also creates a consistent backdrop that makes categories easier to scan.
Under-Shelf Baskets
Quick Tip: Use clip-on baskets for lightweight items that do not fit neatly on the shelf. Check the weight rating and confirm the basket does not block taller items below.
Under-shelf baskets use space that often goes unused between pantry levels. They work well for flat packets, napkins, or small wraps, but not for heavy jars. Measure the vertical clearance before adding one, then slide it along the shelf until the stored items are easy to reach.
Meal Prep Zones
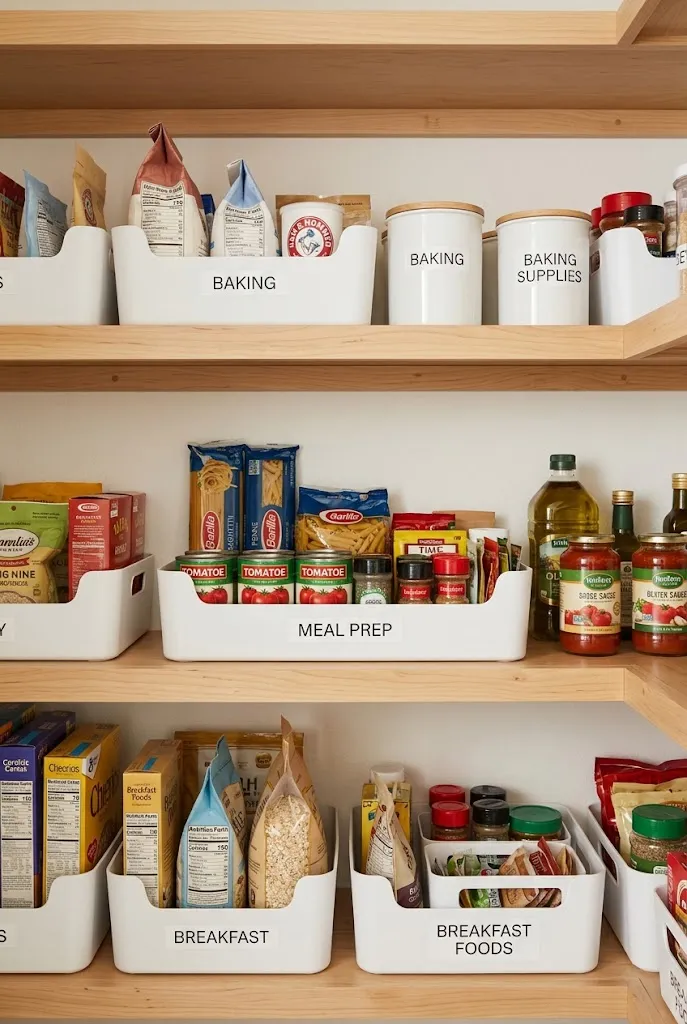
BEFORE: Pasta sits behind canned goods, while spices and sauces are spread across several shelves. Pulling one dinner ingredient forward often hides another.
AFTER: A shallow bin groups pasta-night staples together near the front. Other meal ingredients have their own labeled areas, making weeknight choices easier to find.
Group foods by how you use them, such as breakfast, baking, or quick dinners, rather than by package shape alone. Keep the most common meal ingredients at a comfortable height, and put occasional supplies farther back. A removable bin lets you bring several items to the counter at once.
First-In, First-Out Rotation
- Group matching foods: Keep duplicates of each item together on the same shelf or in one bin.
- Check dates as you restock: Bring older packages forward before adding new purchases.
- Place new items behind: Keep the earlier stock easy to reach at the front.
- Review the shelf before shopping: Note what is already open or nearly finished.
A simple rotation routine helps prevent forgotten packages from lingering at the back. Keep original date and storage information visible, and use the oldest suitable item first. A quick shelf check during grocery unpacking takes little time and can reduce waste over the month.
Open and Lidded Bins
Choosing the right container can make deep shelves easier to use.
| Feature | Open Handled Bin | Lidded Container |
| Best for | Packets used often | Dry goods needing a tight seal |
| Access | Pull forward quickly | Remove the lid to reach contents |
| Visibility | Contents easy to scan | Clear sides show remaining supply |
Use open bins for packaged snacks or meal components you reach for daily. Choose lidded, airtight containers for dry goods that need protection from moisture or pests. Measure the shelf before buying, and leave enough clearance to pull each container out without bumping the shelf above.
Heavy Items Below
DO
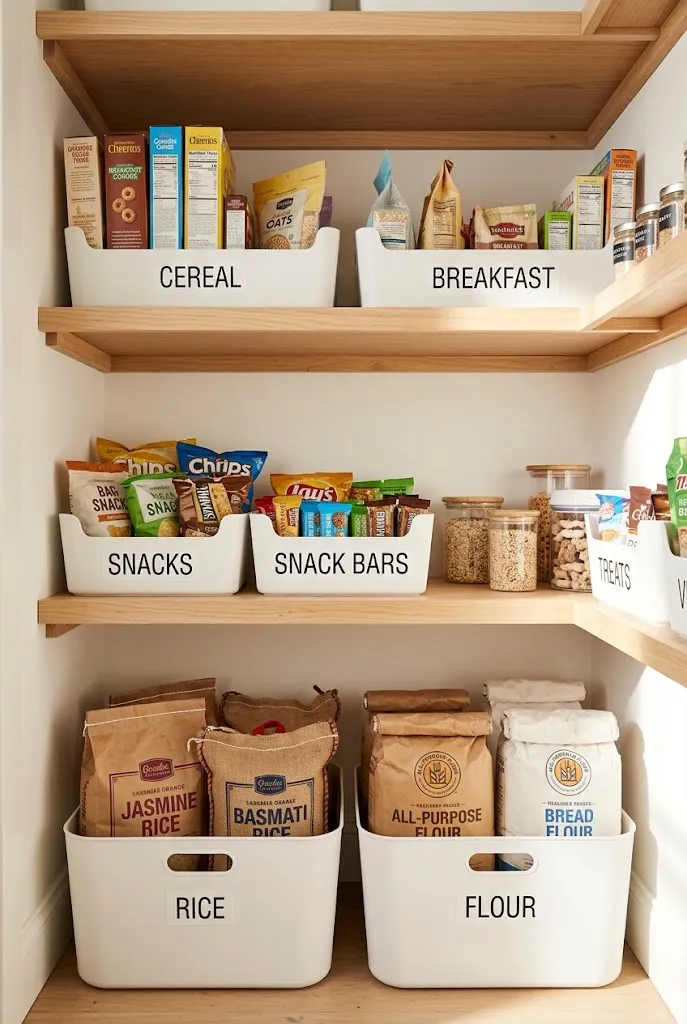
- Store bulk bags and heavy jars on the lowest shelf.
- Use a stable bin with handles for lifting heavy packages.
- Keep everyday items at a comfortable reaching height.
DON’T
- Place heavy containers above shoulder level.
- Stack fragile jars where they could fall.
- Overload a shelf beyond its rated capacity.
Keeping heavier supplies low makes the pantry safer and easier to restock. It also reduces the chance of lifting a bulky package over your head to reach the back. Place a small basket on the floor only if it does not block the doorway or create a tripping hazard.
Pantry Inventory List
Best For: Households with frequent pantry restocks
Cost: Low
Skill Level: Beginner
Result: Fewer duplicate purchases and forgotten supplies
A short inventory list can help track what sits at the back of a deep shelf. Note only staples that are easy to overlook, such as rice, canned beans, or baking flour. Update the list as items run low, and check it before shopping rather than recording every package.
Narrow Rolling Cart
A narrow rolling cart can turn an unused gap into pantry overflow storage. Measure the gap at both floor and shelf height, since baseboards or cabinet handles may reduce the width. Choose a cart slightly narrower than the tightest measurement so it slides out without scraping the wall.
I’ve noticed the cart works best for items you need often, such as oils, sauces, or lunch supplies. Keep heavier bottles on the bottom tier and group loose packets in a shallow bin. If the gap is very tight, test the cart’s wheels before loading it.
Adjustable Shelf Heights
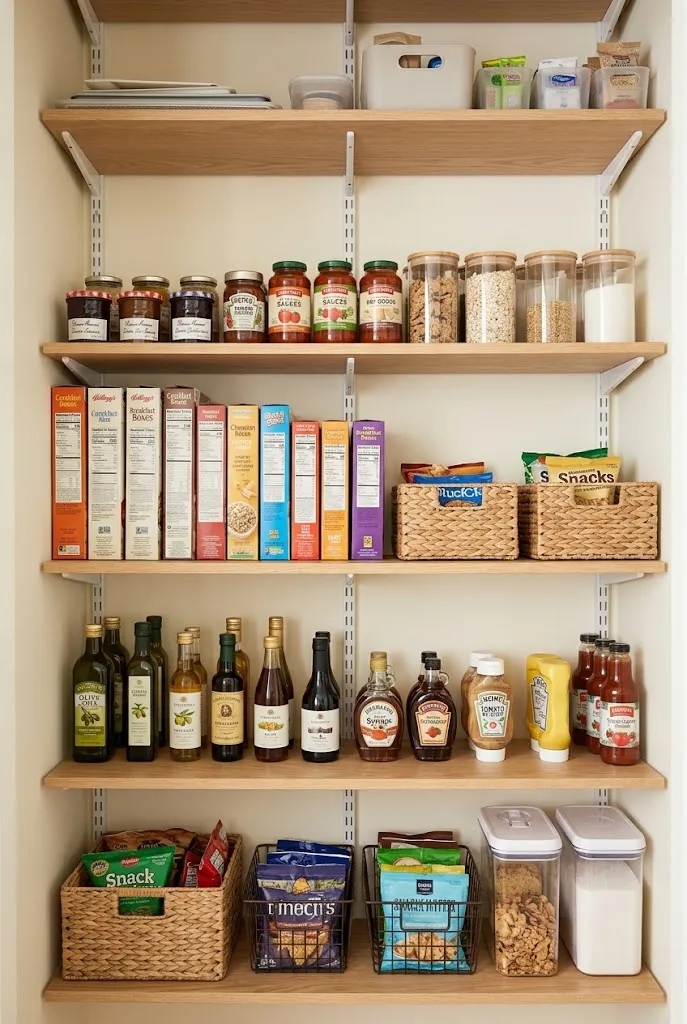
- Place tall bottles or cereal boxes on shelves with extra vertical clearance.
- Keep shorter jars together on closer-set shelves.
- Leave enough space to lift containers out without scraping the shelf above.
- Recheck shelf spacing when your pantry staples change.
Adjustable shelves let the pantry fit the food you actually buy instead of forcing every package into one layout. Keep the most-used items between waist and eye level, and reserve upper shelves for lighter backstock. Before moving a shelf, check that its supports are seated securely in every bracket.
Clip-On Shelf Lights
Quick Tip: Choose battery-powered or rechargeable lights with a motion sensor for shelves without a nearby outlet. Check that the light will not shine directly into anyone’s eyes.
Better visibility can make deep shelves easier to scan and help prevent forgotten packages. Place a light near the front edge of each dark shelf, where it can brighten labels as you reach in. Clean the surface before attaching adhesive lights, and replace or recharge batteries as needed.
Shelf Edge Labels
BEFORE: Items move between shelves after grocery trips, so no one remembers where each category belongs. Packages at the back are difficult to identify.
AFTER: Clear labels mark each shelf zone and guide everyone to return food to the same place. The front edge stays readable even when bins are pulled forward.
Keep labels short and specific, such as “Breakfast” or “Baking,” so they remain easy to scan. Use removable labels if your categories change often, and place them where bins will not cover them. A consistent system helps household members put groceries away without asking where each item belongs.
File-Style Packet Bins
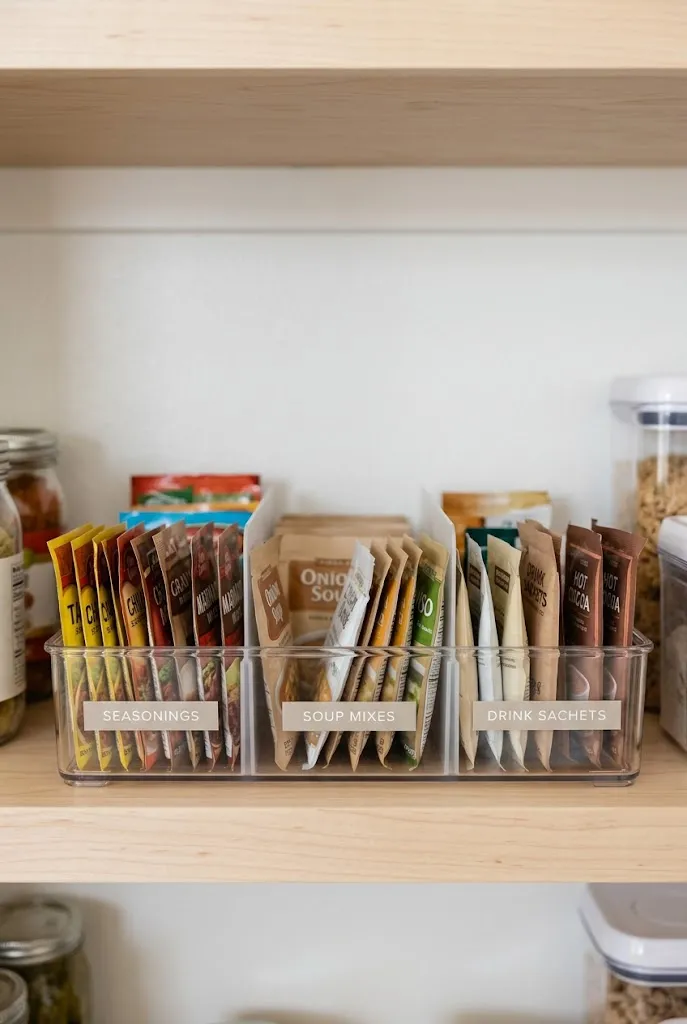
- Choose a shallow bin: Measure the shelf and select a container that can be pulled forward easily.
- Add dividers: Separate seasoning mixes, soup packets, and drink sachets.
- Stand packets upright: Arrange them so the labels face forward and remain visible.
- Remove empties promptly: Check the bin when restocking and recycle used packaging.
Small packets often disappear beneath boxes or slide to the back of a deep shelf. A file-style bin keeps them upright and grouped, so you can see what is available at a glance. Use dividers that lift out for cleaning, and avoid packing the sections so tightly that packets become hard to remove.
Bulk Refill Containers
A bulk package is easier to manage when you choose a storage method that fits how often you use it.
| Method | Original Package | Airtight Container |
| Best for | Sealed refills or infrequent use | Staples opened often |
| Visibility | Package label shows details | Clear sides show remaining amount |
| Storage | Flexible, but can be bulky | Neat, but needs a good fit |
Decant only the amount that fits comfortably, and keep the original package information for ingredients and dates. Use clean, dry containers with tight-fitting lids, and avoid topping up a container before checking its contents. A shallow bin can hold unopened refills behind the everyday supply.
Safe Shelf Loading
DO
- Put heavy jars and bulk bags on low shelves.
- Check shelf supports and weight limits before loading.
- Leave room to lift containers out safely.
DON’T
- Store heavy glass containers above shoulder height.
- Stack packages where they can slide forward.
- Block ventilation or pantry access with floor bins.
Safe loading makes pantry items easier to reach and lowers the risk of falling containers. If a shelf bows or its supports feel loose, move heavy items elsewhere until it is repaired. Keep frequently used foods at a comfortable height, and reserve high shelves for light backstock.
Weekly Pantry Reset
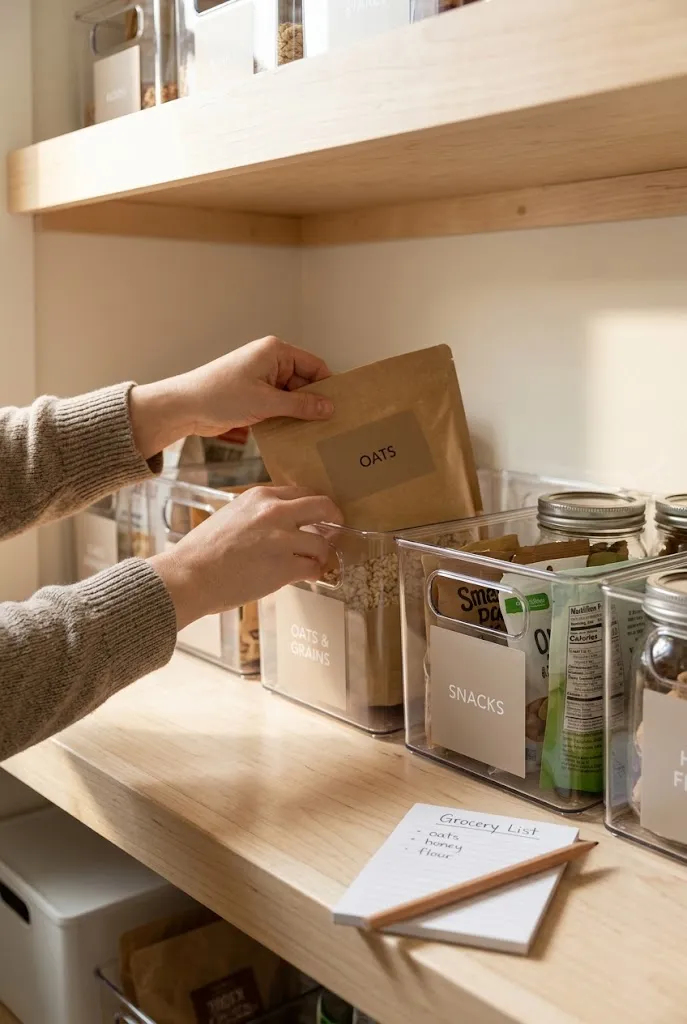
Time: Five to ten minutes
Best For: Busy households
Skill Level: Beginner
Result: Clear shelves and fewer duplicate purchases
A short weekly reset helps keep deep shelves from becoming cluttered again. Pull forward the foods you use most, return misplaced packages to their zones, and note staples that are nearly empty. Check dates on items you rarely reach for, then add only what you truly need to the next shopping list.
Conclusion
Deep shelves can be easier to manage when everyday foods stay near the front and backstock has a clear place behind them. These ideas show how bins, labels, shelf zones, and simple routines can make pantry items easier to find and restock. Start by measuring one shelf and choosing a change that suits your household. Save this guide on Pinterest for your next organizing session, try one of the how to organize small pantry deep shelves tips, and share the article with someone working with a small pantry. A thoughtful setup can make daily cooking feel simpler. If your kitchen shares space with the living room, these small kitchen living room ideas make the whole layout feel brighter and more open.
5 Comments